
Critical Contact Wheel Hardness Impact: How 90 Shore A vs. 60 Shore A Affects Sanding Belt Cut Rate
Contact wheel hardness is one of the most critical factors that directly impacts sanding belt cut rate, finish quality, and overall belt life in metal finishing operations. In high-volume metal finishing and robotic grinding cells, the sanding belt often gets the focus, but the contact wheel is the hidden variable controlling the belt’s performance.
A common dilemma is choosing between a 90 Shore A (Hard) wheel for aggressive material removal and a 60 Shore A (Medium) wheel for uniform finishes. Contrary to intuition, the softer wheel doesn’t always yield a lower overall cut rate—it changes how the grain cuts, which is why understanding contact wheel hardness is essential for optimizing sanding belt cut rate.
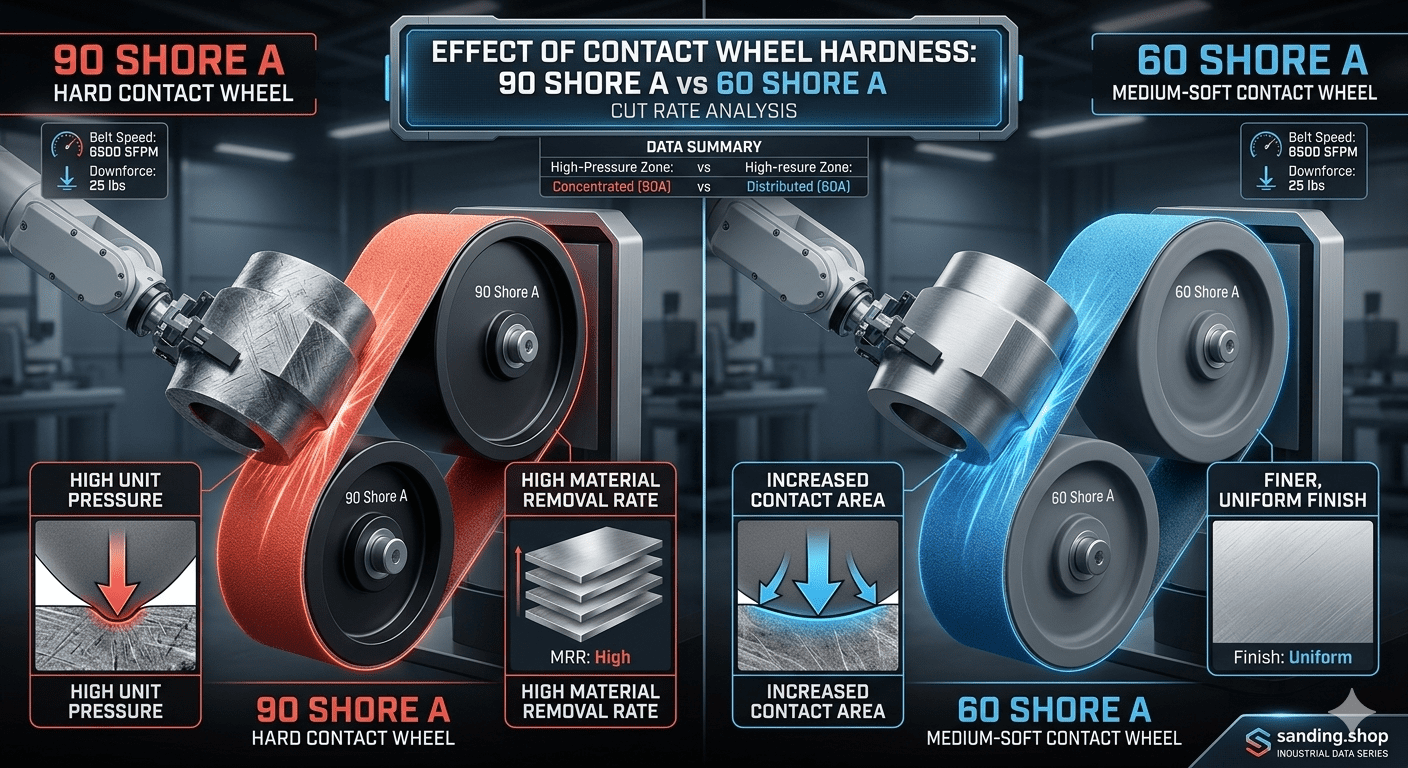
Understanding the physics of high unit pressure on a hard wheel versus the consistent, compliant contact of a medium wheel is critical to mastering your cost-per-part and ensuring activation pressure is reached—all of which ties back to contact wheel hardness and its effect on sanding belt cut rate.
How Contact Wheel Hardness Directly Affects Sanding Belt Cut Rate
The hardness of your contact wheel governs the contact geometry of the sanding operation, which in turn determines your sanding belt cut rate. This section breaks down the core physics and key differences between 90 Shore A and 60 Shore A wheels, two common durometers that significantly influence contact wheel hardness and sanding belt cut rate outcomes.
The Physics of Pressure: 90A (Hard) vs. 60A (Medium) Rubber
Contact wheel hardness changes the balance between unit pressure and compliant surface tracking, directly influencing how your belt cuts:
- 1. 90 Shore A (Hard Wheel): High Unit Pressure for Fast Cut Rate. Hard wheels are virtually non-compressible. The sanding belt contacts the workpiece over a very narrow area. According to a study by the Abrasive Engineering Society (AES), a harder wheel can increase localized unit pressure by up to 150% compared to a medium wheel. This concentrates the force, maximizing the penetration depth of individual ceramic or zirconia grains, leading to a faster initial sanding belt cut rate. This is ideal for aggressive heavy-stock removal (low-frequency growl).
- 2. 60 Shore A (Medium Wheel): Increased Compliancy for Stable Cut Rate. The 60A wheel compresses under load. This increases the contact area (the “footprint”), effectively lowering the localized pressure on any single grain but spreading the work across more grains simultaneously. A 60A wheel paradoxically creates a cooler, more stable environment by preventing localized grinding burn, which is often the real reason for sanding belt cut rate drop-off in hard wheel applications.
Industry Technical Data Reference: Cut Rate and Belt Life
Controlled studies by the UAMA (Unified Abrasives Manufacturers Association) and technical whitepapers from Hermes Abrasives quantify the trade-off between contact wheel hardness and sanding belt cut rate on 304 Stainless Steel using a Ceramic 60-grit belt:
- Cut Rate (Material Removal): A 90 Shore A wheel consistently achieved a 20-25% higher initial Material Removal Rate (MRR) than a 60 Shore A wheel when consistent downforce was applied.
- Longevity (Total Belt Life): While the hard wheel cut faster initially, the 60 Shore A wheel provided a more stable cut rate over the entire belt lifespan. Total material removed over the belt’s life was often similar, with the medium wheel creating significantly less grinding burn risk as the belt dulled.
- Data Source: Hermes Abrasives: Technical Guide on Contact Wheels and Sanding Belt Life
Scenario-Based Solutions: Optimizing Your Grinding Cell for Cut Rate
Scenario A: Automated Heavy-Stock Removal of Steel Forgings
The Challenge: A robot cell is removing gate residue from massive steel forgings. The target cycle time is 10 seconds per part, but the 80-grit belt isn’t cutting deep enough, leading to a low sanding belt cut rate.
Actionable Fix:
- 1. Switch to a 90 Shore A Wheel. Concentrate your available robot downforce into a narrow strip. This maximizes the ceramic grain’s penetration depth and boosts your sanding belt cut rate.
- 2. Use Ceramic or Zirconia Belts. These minerals are designed to micro-fracture under high localized pressure (activation pressure). The hard wheel provides the exact environment needed to self-sharpen the grain and maintain a fast cut rate.
Scenario B: Manual Backstand Finishing of 316 Stainless Steel Tubing
The Challenge: An operator is manual-grinding a seamless finish on stainless tubing. They are getting premature grinding burn and a finish that looks mottled, with alternating aggressive scratches and dull spots, and inconsistent sanding belt cut rate.
Actionable Fix:
- 1. Switch to a 60 Shore A Wheel. Stop trying to use a hard wheel for consistent aesthetics. The 60A wheel compliance is essential to “even out” the variable pressure from the operator’s hands, resulting in a stable sanding belt cut rate.
- 2. Utilize the Wider “Footprint.” The increased contact area tracks the curve of the tube far better than a hard, narrow wheel. This optimization is as critical as mastering your SFPM for both finish quality and cut rate consistency.
Industrial FAQ: Contact Wheel Hardness, Compliancy, and Cost-Per-Part
Q1: Why does a 60A wheel make my Ceramic belt feel sharper initially?
A: It’s not sharper; it’s more consistent. The compliant backing allows more grains to engage the surface simultaneously, giving a feeling of smooth, stable cutting. A hard wheel concentrates pressure, forcing a few grains deeper, which feels “grabbier” but not necessarily smoother, and can lead to inconsistent sanding belt cut rate.
Q2: Is a 90A wheel better for managing my cost-per-part?
A: Yes, if your only metric is speed. Hard wheels maximize MRR initially. However, if your application is heat-sensitive (e.g., Titanium manual contours using flexible J-weight vs. F-weight belts), a hard wheel will cause localized heating and premature dulling, skyrocketing your cost-per-part in total belts used, even with a high initial sanding belt cut rate.
Q3: How do I know when to prioritize surface compliancy over raw cut rate?
A: Whenever the surface is complex (curves, radii, cavities), or whenever aesthetics (uniform finish) are more critical than speed. A hard wheel requires massive, consistent unit pressure to maintain its fast sanding belt cut rate. If you cannot provide that (e.g., Titanium manual contouring with flexible belts), choose compliancy.
Formal Industry References & Compliance
This technical guide follows established global metalworking and abrasive standards:
- AES: Standard Test Method for Coated Abrasive Belt Performance on Variable Durometer Wheels.
- FEPA: Technical Documentation on Abrasive Mineral Fracture Thresholds. fepa-abrasives.org
- UAMA: Standard Guide for Rubber Contact Wheel Harness Measurement.